Wednesday, January 28, 2009

Atlas Cedar twin trunk/mother son

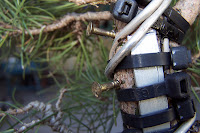
This was a simple transformation of 2 seedlings into a very good Bonsai starter in a matter of 1 hour . Firstly i removed a small sliver of bark all the way down to the hardwood on both plants . Then i wrapped the 2 trunk bases together with duct tape or electrical tape to hold the veneers together . I then applied cable ties to the join in the trunks and secured to prevent movement and to allow the trunks to fuse together .


Repotting into a larger pot than normal and securing the plant so i could wire without damaging the roots . Then i set about applying the wire and styling the trees , the end result is 1 very nice Bonsai starter which will be allowed to grow on unchecked or trimmed for a couple of seasons .
This method of joining the trunks has many uses in Bonsai for producing thicker trunks as well as multi trunks and improving branch structure . The age of the seedlings used is 2and 4 years in training for 5 minutes

Tuesday, January 27, 2009

Himalayan Cedar Cedrus Deodora

This was a simple transformation of 2 young Cedars of different ages into a very good Bonsai starter . I simply removed a sliver of bark at the base of each trunk to allow a veneer graft of the trunks to occur . I placed duct tape over the veneer then using cable ties i secured the bases together to produce a Twin trunk style tree .


With the base secure i then simply wired each individual trunk into the desired shape to represent a Mother / Son style Bonsai . I then trimmed the branches to a more uniform length to suit the design intended . Whilst Deodora's are probably not the best tree to use for this type of Bonsai , i am very happy to step outside the boundaries of the normal rules . Rules are only guidelines and i like to break the rules , if i had to obey them i wouldn't do Bonsai .


Saturday, January 24, 2009

Raft Style Juniper

This was a pleasure to do as it was inspired by a newcomer to Bonsai .I mounted the Juniper onto the Raft slab i made previously.


With the Juniper still in its container i wired the branches in preparation for the new style . Then i proceeded to the slab and using a muck mix i built a perimeter wall around both base and slab . This will add depth to the slabs a per a Bonsai tray or shallow pot . Potting the tree in the normal fashion in the base, then sliding the raft slab into position over the trunk of the Juniper . I then prepared the raft for planting ,with a small amount of soil spread over the bottom , placing a small amount of Sphagnum Moss over the soil would assist root development on the trunk .


With a sharp knife i removed numerous small squares of bark from the underside along the trunk and painted them with Hormone jel to aid root development . I immediately bent the trunk down onto the moss and wired into position using a rubber pad to prevent damage to the tree .With the Juniper secured to the slab i placed more moss in and around the trunk to ensure contact and to retain moisture for the new roots .


I topped up the slab with soil and placed moss around the trunk to improve the landscape and increase the impression of age . I then gently maneuvered the branches into the upright position as per trees in nature . The Juniper will be allowed to settle then some fine tuning of the foliage will take place to represent small trees in a grove . This entire exercise took only 5 1/2 hours to complete , 30minutes to make the Cantilever Slab/Base , 1 hour to wire and 4 hours to complete the landscape . All in all i am very happy with the end result . Cheers


Friday, January 23, 2009

DRIFTWOOD STYLE INSTANT BONSAI

This was a simple driftwood style project . Using a collected stump from a dead Tea-tree i simply grooved the area where the Juniper would be placed . Firstly i drilled a series of holes in the trunk and removed the excess material with a chisel until i reach the desired depth . Placing the stump up against the tree i then work out how much material would be required to be remove to accommodate the trunk of the Juniper .


Splitting the trunk of the driftwood made it easier to remove the hardwood to insert the plant . With the grooving and channeling complete i inserted the juniper into the groove and with the use of wire and rubber pads i tied the tree into position . As the juniper trunk was too thin to use screws the wire alternative was used . At a later date i will screw the whole project together using Stainless Steel or Solid Brass Screws .


Wiring is easier before the tree is mounted however care should be taken so the wire can easily be removed without damaging the finished Bonsai

CANTILEVER SLAB PROJECT


This was a simple Cantilever Slab Project that a member from http://www.gardenexpress.com.au/ Bonsai Forum challenged and inspired me to make . I used 2 slabs of Ironstone to construct the setting . I set about working on a suitable angle for the Raft ,when the angle looked pleasing i began with an angle grinder and marked the base slab at the point of intersection . Grinding the rock at the anticipated angle and to the desired depth , removing the access as i made a series of cuts .


With the base complete i began on the Raft to fit the groove in the base . Very little effort was required as i used a Diamond tipped Masonry wheel . With the Raft and Base fitting snug together in the groove i removed a small piece of material in order to accommodate a trunk into which i will mount a tree .For added depth i removed material around the base to make a depression for the root ball of the desired bonsai . Cross hatching the Slab and Base to assist drainage and the root system took place after fitting together of the slabs.


This project took 20-30 minutes to complete and at the end i have a fantastic new Landscape base to work with


Sunday, January 11, 2009

Yamadori Pine No 2


This was the result of some inspiration and design by my Brother . Chris has done many courses with some great talented Bonsai-ist . I had in mind to keep them as informal upright or slanting styles , Chris had a more challenging approach to the overall design .

In the finish the results of Chris's years of classes and discussion groups has paid off , i chose to challenge myself to create from a simple drawing to this finished trainer . In future i will endeavour to study the tree to be trained from several different outlooks .

With drawing in hand i set about removing the lower branches , working up the trunk to the stub i cut a taper from the top to the trunk . Then using the saw i cut a vertical slit down below the intersection of the trunk and stub . Using a wooden wedge i then spread the stub to enable wire to be inserted to assist bending and flaring the stub to represent jinned branches .


With the jins wired , i set about trimming unwanted branches to the drawings . Undercutting of the leader was required {removing a small wedge from underneath the branch} to assist bending of the thick trunk at a severe angle and with the wires ready i set the wires and bent the trunk into the desired shape . With such pressure on the undercut branches i have had to over wire the trunk {very untidy} but affective as any movement at the cuts will affect the healing process of the wounds . My NEW trainer is something special, thanks to Chris .


Saturday, January 10, 2009

Chinese Elm slab planting


This was a simple transfer from shallow pot to slab for a Chinese Elm .With the chosen slab i made a mix of clay , sand , moss and composted cedar needles {muck} to build a small barrier around the perimeter of the slab . The mix should be moist and sticky enough to adhere to the rock . Build the wall up to produce a saucer effect to hold the potting mix and to assist in water retention and to give the finished landscape some depth . If the slab has a concave base a drill hole may be required for drainage , simply drill a hole with a masonary drill {dont use rotary hammer} and simply place a piece of mess over the hole .
With the slab prepared sprinkle a small amount of bonsai mix into the base and around the perimeter, place the tree in the desired position and pot up as per normal tray . When back filling press the mix into the clay muck wall to blend into the finished landscape , and prevent water from washing away the wall . Using a small stick push a channel through the wall to breach the barrier to aid drainage .


Depending on the size of the tree wire may be required to hold it in position . Loop a wire up through the drain hole and secure . If the slab doesn't have a drain hole place 2 wires over the root-ball , prior to back filling and secure by folding over the edge of the slab and crimping with pliers . Another method is to wind hemp string several times around the slab , over the roots and secure, this will rot in a matter of months.


With the tree secure and soil in place , simply place rocks and moss to achieve desired effect .

Wednesday, January 7, 2009

Acer Palmatum Windswept/Slanting style


I have here a Mountain Maple {Acer Palmatum} that i picked up at a market for $3.00 it has been broken many times at the ends of the branches , but it does have an interesting upper trunk due mainly to the damage it has endured . Possibly a 4-5 year old neglected seedling .

I removed it from the pot to discover the trunk has a severe 90 degree bend with a poor quality forked root ball that has obviously dried out and recovered numerous times . I trimmed the old hard roots x 3 without damaging the fibre roots as it is the wrong time to root prune , and placed it into a deeper the usual pot to assist in improving the root mass . I will at a later date place a wire tourniquet around the base to stimulate and grow a new root ball . With the tree potted , i simply removed the downward facing branches and removed the unwanted shoots to produce the desired Slanting Style .

Minimal wiring will be required to stimulate the design as the branching is random along the trunk and with the zig-zag already in the upper trunk , i think i will just semi defoliate and see what happens over the next few weeks . I sure this simple trainer will make a quality Bonsai .

Friday, January 2, 2009

Yamadori Pine Transformed


This has been a dream to transform from a ordinary roadside chop-top pine to a very good informal upright in training. Ifirst removed the unwanted stub which was the original leader until the council attempted to kill a few self sown wildlings , they miss by that much . With pines if you dont cut below the bottom branch they will re-shoot quite aggressively as in this case . The 3rd branch from the top had become the new leader so less work for me . Removing the stub and the upper branches except for the one on the original trunk which i will use to balance the tree . Using a coping saw i removed a large ' V" from between the new leader and the upper branch on the main trunk , making sure the " V" would match both sides to ensure a good graft . I then contoured 2 10x3mm aluminium splints to suit the trunk and gently clasped them with vice grips to hold firm while i set about fastening cable ties round the splints and trunk . Removing the pliers i then applied the wire x3 to the trunk , inserting 2 solid brass screws into the trunk to secure the graft together for extra security as the cable ties will be remove in a year or two , the screws will remain hence only" solid brass" or" stainless "screws should be used . Coated screws leech and kill most host trees . With the trunk graft secure i set about bending the trunk into the desired shape and "hey presto" one excellent quality bonsai trainer,i will allow it to grow on until winter when i will look at fine tuning the branch stucture